Showing posts with label bathroom. Show all posts

Monday, September 5, 2011

Basement Progress

With a little one in the house everything seems to take much longer:) The past few weeks have been really busy but with the help of family we have made some significant dents to the basement. We have mentally split the basement into 2 parts- the bathroom and "the rest."

Take a look at the initial progress we had made. We got the platform in and it was ready to be "studdified" by who other than my stud of a husband (sorry could't resist that one).

Bathroom Progress thus far:


"The Rest":


Everything is at least studded out, the electrical 99% done, and ready for green board (definition: drywall with moisture resistance).

Back to the bathroom. We had the plumber come and do all the piping for the toilet and sink. He also moved the washer and dyer shut-off since they were located where the bathroom is. You may wonder- why is there a platform under the bathroom? I would ask the same question. Short story: Building the platform slightly higher than the main drain helps us to avoid an "up flush" toilet (Basically a $1000 toilet vs. $100 regular toilet) and just in case any water happens to come into the basement (as it did a few weeks ago...panic mode ensued...but we just needed to patch some holes in our sidewalk (which Grandpa B and Uncle J did while Peter and I were at the hospital, and in the middle of labor...so we wouldn't have to worry about it after!) and reroute some downspouts.)

We've definitely made some progress since this:


So there you have it. Greenboard is up and we are working on mudding the seams. Next steps are to sand and re-mud a few times, cut out the access panel that will let us get to the water shut-off and water meters, position the light and wire it in, and then to my favorite parts: painting, accessories and making things look cottage-y! Wahoo!

Monday, August 1, 2011

New Project!

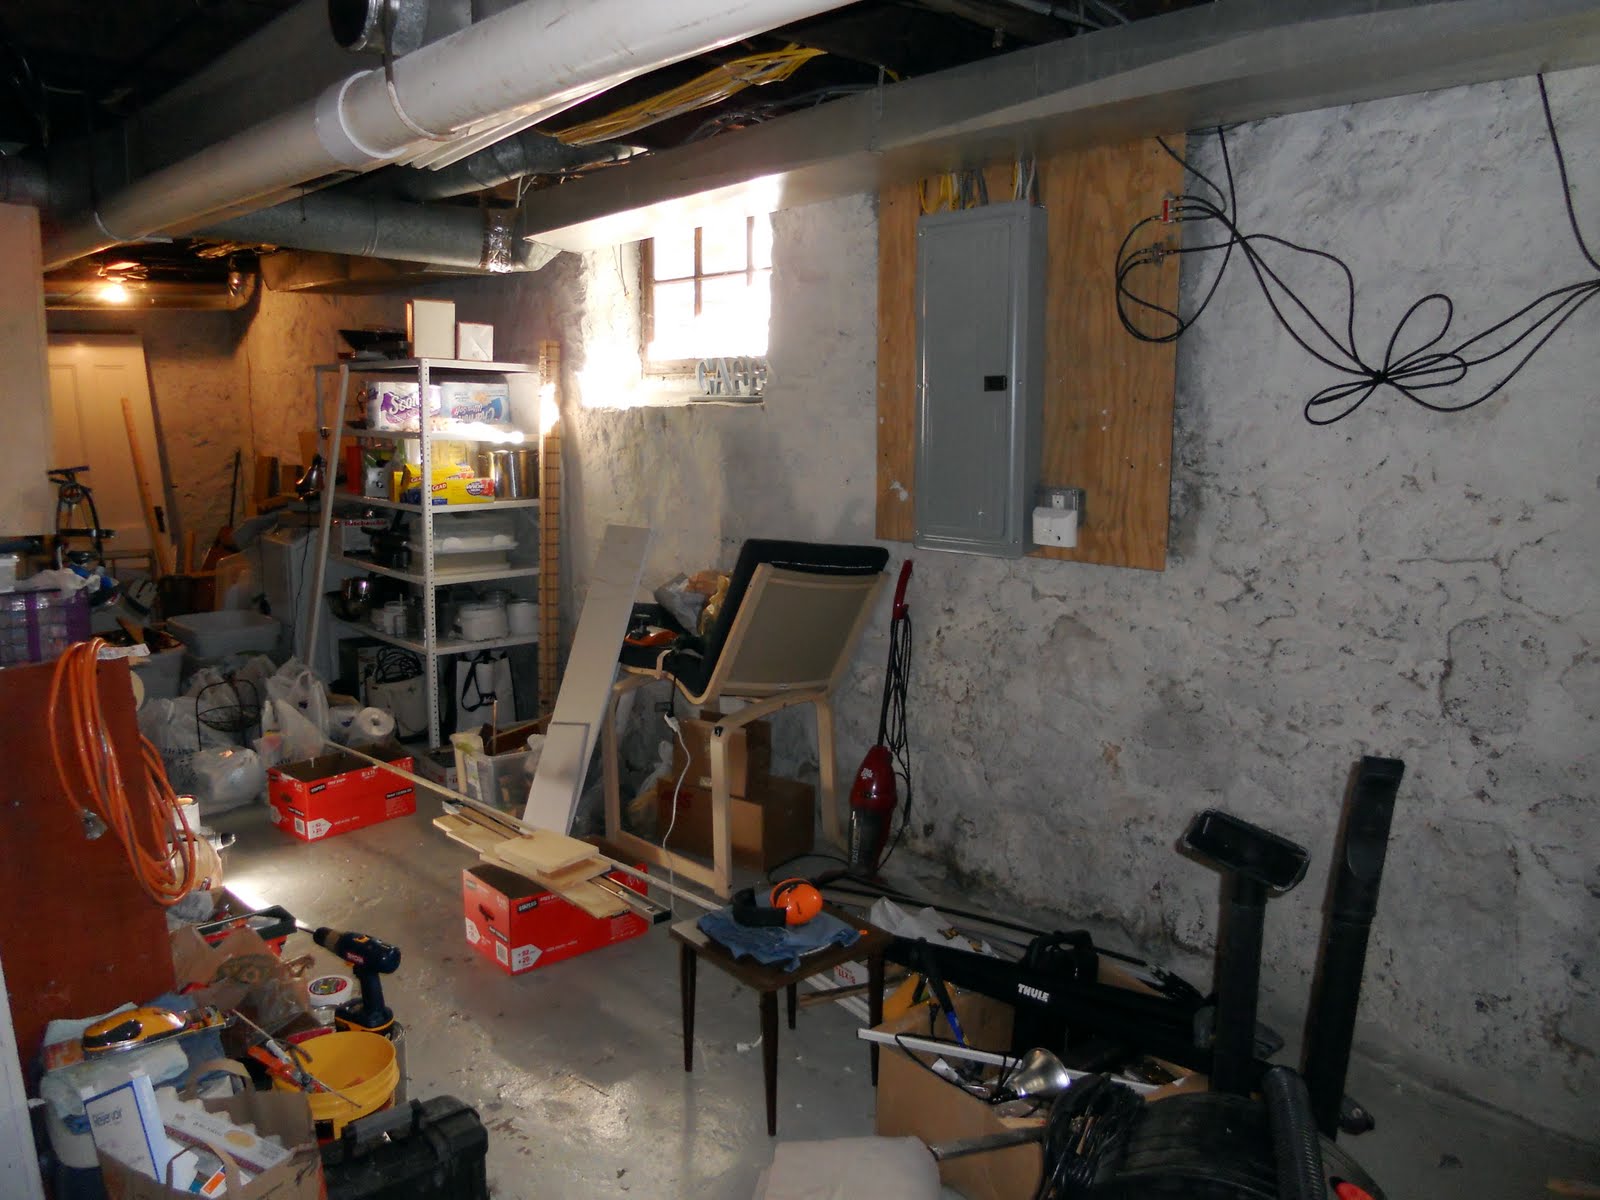
So Little B is due any day now. So why not start another project? Our latest undertaking is the basement. We want to make it a playroom/tv-room hangout-type-space. We also want to add a small half bath since we only have 1 bathroom on the second floor. Here is a pic straight ahead as you walk down the stairs.

Our plan is to put the bath straight ahead from the stairs. Why? I thought you would never ask. In order to make this a budget friendly project we desperately want to avoid purchasing an "Up-Flush" toilet (we're talking $1,000) instead of a $100 toilet from HD or Lowes. Since the main sewer drain is behind the washer/dryer we are going to build a platform that will raise the toilet high enough to avoid the $1,000 toilet situation. I mean, really, who wants to spend $1,000 on a toilet?

So we had a work weekend. Both dads and a brother-in-law came up to help. We got the platform in so we could have the plumbers come in and start their job of moving/installing pipes for the toilet and sink. Here is what the platform looks like from the stairs right now:

 
Here is a shot of the scary-scary basement before we cleaned it up. Some parts of the house really took a beating after the beam project. The basement may be one of those. Ok, it definitely is.
 
Back to the work weekend. We got all the junk cleared out and got to work. We cut out some wall below the stairs to add a closet and extra storage once the basement is somewhat livable:

Who do you think Peter takes after? His dad maybe?

Friday, April 8, 2011

Quick-and-Easy-Bathroom-Spruce-Up

 I love little projects. Especially when they cost under $20! Before I unpacked the bathroom boxes I wanted to spruce up the drawers a little. You could tell the drawers were a little el-cheapo by the little round stickers on the bottom of each drawer that says "C". I know, from past experiences, you only see these little things when it is an assemble yourself dealy. I'm not knocking  the assemble yourself by any means (we are IKEA fanatics) I just like to hide that fact once it's assembled. Here are the drawers and medicine cabinet before my little paper project:

I went to Michaels and  was super excited to find scrapbooking paper was on sale. I picked up 3 12x12 sheets for a whopping $0.51! Phew! I broke the bank. Here were my supplies:

  1. My trusty paper cutter
  2. A roll of double-stick tape I had on hand
  3. A measuring tape


 I measured the drawers and they were 14". A little longer than the 12" paper. I just added a 2" strip at the end and incorporated it in using the double stick tape.


TA DA! Pretty drawers! Oh Yeah and I had a little left over. I'm not even going to pretend I planned on doing the medicine cabinet. You likey?

 Here is the medicine cabinet:


 I wrapped the paper around the edges so it would "pop" a little more.


I'm not done though! Look what I found in the clearance section at Target! A nice stainless tension rod for our shower curtain. $10 off the original price just because it has been opened before. I don't mind. In fact, someone else did all the work for me. I just had to undo the tape! 

Here is the kinda ugly white tension rod that was here before:


 And after! A quick fix that spruced up our little bathroom. Now I'm ready to unpack! I want to make a new shower curtain since our old one is a little too matchy-matchy with the walls:


 And there you have it. A quick project for under $20 total and you can see the results in under an hour! My kind of project. It basically took me as long as an hour-long t.v. show on the DVR. Yes, that's right 40min. I wonder if I would have gotten this project done if Grey's hadn't been a repeat...
Related Posts Plugin for WordPress, Blogger...