Showing posts with label dining room. Show all posts

Thursday, September 22, 2011

Make Your Own Bay Window Treatment

I've wanted to hang some curtains in our dining room- not really for any functional reason but because I think they look pretty and soften the room a bit. Since we have amazing blinds that came with the place, we really don't need them for any other purpose (key point, as this DIY window treatment is totally not functional :)

I started doing some research on curtain rods for the bay window in our dining room. Here is what it looked like before:

Bay Window treatments are expensive! The cheapest I could find was $70 including shipping. Then to add the curtains on top of that- no thanks! An example of one of the rods I found:
See how the windows above have 2 curtains on the corners? I didn't really want to block that much of the window so we only hung one curtain. Since we don't want to "use" the curtains my personal prefrence made our job a whole lot easier!

I figured we could probably noodle out a way to make our own. Nothing a little spray paint can't handle!
I bought some super glossy black spray paint, a few dowels from home depot, standard (read: cheap) curtain brackets (6), and two wood finials.

I had Peter cut the dowels to our desired length, and we glued the finials to the ends. Next came the spray paint! I did a few coats on everything - including a re-coat after the dowels needed a little light sanding in between coats.

My part was done for now. I eagerly awaited Peter coming home from work so he could mount my brackets! Once he did that, I hung the dowels on their brackets and measured the curtains to length. We bought the standard cheap white curtains from Ikea that only set us back a few bucks. They even include hem tape- so this is a no sew project!

Voila! Curtains hemmed and ready to be hung! We used the sleeve instead of the big loops on the curtains - I just liked that look. It was a super tight fit, but they don't need to move, remember?! I knew you would...

We were going to glue the corners together (Peter had mitered the corners in anticipation). Then...when we went to hang them, we realized we wouldn't be able to slide the curtains on if they were glued! haha. Live and learn. Since the brackets have a screw that allows you to tighten them and firmly hold the dowel in place, we had no need for gluing anyways! The curtain covers our makeshift corners anyway. No one will ever know. Shhh...

Here is the final product...


I am thrilled with how it came out. Even more thrilled with the price tag. Heres an approximate price breakdown:

Spray Paint: $3
Wood finials: $4 set of 2
Dowels: $4
Brackets: $6
Curtains: $13 per pair.  $26 total

Total: $43!

That's cheaper than the rod itself! Note: if you did want the curtains to be functional you could glue corners together and add those curtain clips to the rods...

So happy with the result and I am so glad I didn't buy a new curtain rod :)

Tuesday, July 12, 2011

The Dreaded Beam Project: Complete.


After more than two months of work, the living/dining room transformation is finally complete! I know people live in construction zones for greater periods of time, but man, having such a central area of our place in various states of assembly was wearing. The result, however, is totally worth it. Check out the before and after photos:


I learned a tremendous amount through this project, from brute-force demolition to finicky finish work to proper prep and thorough clean-up.


The two things that I am most happy with are the landing and the fact that the beam doesn't look brand-new. The landing was originally carpeted - same as the stairs - and square. We pulled up the carpeting, which covered old linoleum, which was glued to the hardwood underneath. My question quickly became: What possessed a previous owner to use the most adhesive mix of paper and glue possible? Was he laughing as he put it down, finding some twisted humor in imagining another owner slowly chiseling it all up? (But then again, is that any different than me using enough nails, screws and caulk to sink a ship to put up trim...and feeling only slightly bad for the guy that tries to take it all down?) Thankfully, the hardwood cleaned up beautifully, and taking the corner off the landing (nice idea Jen!) didn't prove to be too difficult, although it did challenge my joinery skills.


Before it all began..


After
Before

After

The overall look to the first floor is fantastic. Thanks to my friends, Caulk and Putty, you can't even see my two thousand mistakes. Some points of learning I'll pass on to those who might take on any home project:
  • When demo-ing horsehair plaster: plastic off EVERYTHING, EVERYWHERE...and do it all in a day
  • Use new wood for trim, because ultimately, the hours spent getting the old stuff back in working shape just isn't worth the trouble
  • Use REAL wood for the trim - for some odd reason I bought composite quarter-round for the landing trim. It's great for outdoor applications, I'm sure, but doesn't behave like wood at all. It shatters when a nail goes in wrong...
  • Borrow/rent/buy an air-nailer, especially for trim work (thanks for lending me yours, dad!) - you will live longer if you do
  • Sharp blades, fresh sandpaper, and clean brushes are more valuable than gold. Change/sharpen often (Peter's lesson: don't agonize over a 50 cent sanding disc)
  • Good prep is always worth it.
    • The extra 5 or 10 or even 30 minutes spent making sure something is done correctly makes the finished product go from "Did you do that part all by yourself?" to "Wow, I didn't even know that wasn't original."

    So that's the story friends. Dad/Dad-in-law and brother, thank you. Beam-lifters, thank you. Jen, your patience and encouragement of my novice efforts was invaluable to my husband-ego and to getting this done.

    (Insert craigslist savvy shopper here)
    Take a lookie at this Pottery Barn Buffet  I snagged on Craigslist for $60!
    Doesn't it look great! I am really excited about that wall above it...stay tuned...

    Wednesday, June 15, 2011

    Dining Room Progress

    Thought I would fill y'all in with a little dining room update since I am sure most of you have been on the edge of your couches/lazy-boys seats in anticipation of the wall demo reveal. Progress on that real soon. Ahem...husband?

    So let's recap a little on the dining room journey. Remember what it looked like when we moved in? Want to see the rest of the place with nothing in it? Check it out in our house tour.
    As you remember from this post we have never had a dining room and had to start from scratch. We got the furniture on Craigs list and on a crazy Ikea adventure. This is what I wanted the room to resemble from Ballard Designs:

    I definitely didn't want those kinda price tags though. Luckily Mommy the sewing-extraordianaire stepped in and took over the slipcover making fiasco. Remember round #1?

    Well, she perfected the pattern while I was busy prepping myself for Little B and Arts Fest Beverly!
    Look at how nice the slipcovers look!
    The best part about them? They can be taken off and washed! Bring on the mess Little B! See if I can handle you...

    Ok, as promised here is the progress so far:


    Doesn't the back of the hutch match the chairs perfectly? I can hardly contain myself.  The only thing that bothers me terribly is the chandelier in the center of the room. I mean really? Where would you walk if I put the table in the center? Tossing around ideas without moving the electrical right now.  Anyone ever encountered this problem? I also want to add some curtains to the bay windows sometime soon. Thanks to my friend Jill for getting us that cute plant on the table as a housewarming gift. We love it!

    Thursday, April 14, 2011

    The Room We've Never Had Before...

    A Dining Room!


    The great thing about this room (see house tour here)  is it's blank-slateness. Wahoo. A built in hutch, a bay window, and a chandelier. Now what? I love looking at magazines for inspiration, including two that I can see from my perch on the couch: Ballard Designs and Pottery Barn. Although I would love to recreate the beautiful pages from these magazines right here in our cottage- the whole unlimited money thing is kind of lacking these days or any day.

    Here is the room I stumbled upon in the most recent Ballard Designs catalog. I am not usually a black furniture type of person, but I love this look. You can totally get the feel of the typically white/neutral tone cottage look while having bolder color accents.


    So this brings us to the first of many dilemma's. How can I (and with Peter's help of course) recreate this look for a fraction of the cost? Let's start with the table, since it's the focal point of the room. The nice table above retails for about $1000. Not that bad a price for a well-made dining table that you save for over the years. But I would really like one sooner than "over the years." Pete and I are so excited to have a place to entertain and open our new home up for gatherings. Considering that I would have loved to have a nice little dinner party last week, the whole $1000 dining table wasn't really "in the cards" per say.

    ---Insert savvy craigslist shopper extraordinaire--- I will give you a Craigslist tour of the furniture I've snagged some other time, because I am quite proud of the steals we've gotten. I can pretty much walk around our place and tell you the deal I scored on just about any of the big furniture. Ok, back to the table. See? I just get so excited about my deals!

    I looked and looked for a sturdy solid wood table that has leaves to expand (I want to keep it on the smaller size for day-to-day use) and finally stumbled upon this Ikea gem:


    No, no. Don't worry. I don't think it's $300 worthy. It will, however, seat up to 10 people. We couldn't fit 10 people in our last apartment. The greatest thing about this find is the color (black) and the simplicity of the table. I am way more excited nervous  about tackling semi-DIY chairs like the Ballard "dream" dining room. So, back to Craigslist. I found this table from a gal moving out of the country from Harvard Square. Price tag, you ask? I bartered it down to $100 (she was selling ugly chairs with it). So, our semi-long term table search is over.

    Now I have to recreate those beautiful chairs! At $140 a pop for the chair, 2 yards of fabric at $24/yd for the slipcover AND a whopping $90 charge to make each slipcover, we'd be looking at $278 per chair (almost $1,700 for 6...gulp!) to achieve this look. HAH! No thank you. You read in Pete's last post that we went on an adventure date to IKEA in search of parsons chairs and ended up with these beauties at $50 each!


    They don't look this nice quite yet since we didn't buy the white covers. They charge $10 each for the white slipcovers. Not bad at all- just not the look I am going for. I did buy one slipcover only to tear apart and mark up with a permanent marker for a pattern using my new fabric!! I scored it for $6/yard. A little better than the Ballard Designs fabric but just as beautiful! (I went with the fabric on the right...)


    I ventured out to my mom's house and used her sewing expertise to guide me in my slipcover preparations. If anyone can do it, she can. My goal was to learn everything I could in one evening and then I could return home and make the covers for the last 5 chairs.

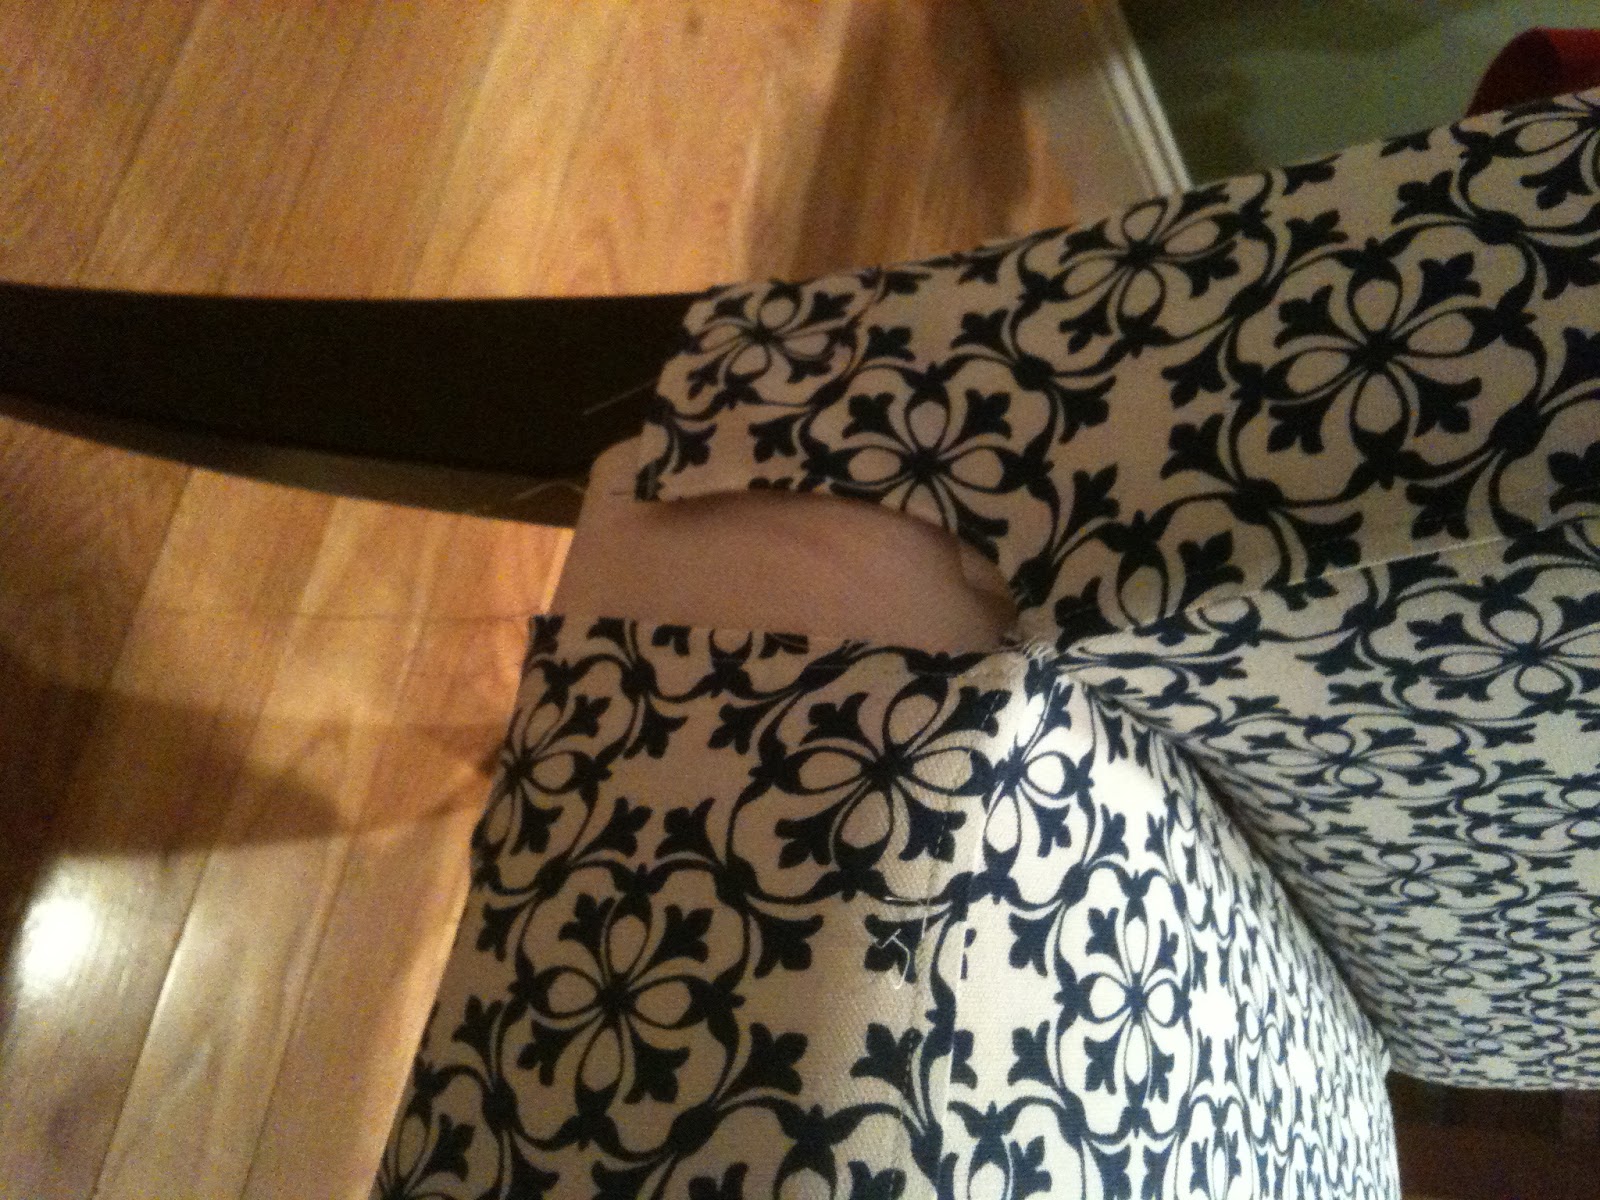
    Not everything in the sewing world goes as you plan, I am sorry to say. I was hoping to show my readers a few success stories before I hit a speed bump in the road of DIY'ing. Oh well, such is life!

    Modesty is key. We want our chairs totally
    covered...no splitting seams, please.


    The front view looks GREAT! I can't wait to see how they turn out. Unfortunately, I have to wait a few weeks to work on them again with mom-the-sewing-extraordinaire. In the meantime I will sit tight and contain my excitement to host dinner parties.


    Anyone else want to make me feel better and share their DIY'ing flops?
    Related Posts Plugin for WordPress, Blogger...