Thursday, April 28, 2011

The Demo That Wasn't...

Well, we started demo! I am going to leave it to hubby to give you the low-down on the actual demo. Here were the very first swings caught on video. It didn't last too long...(for me)


So I have to say after my 2min 15 seconds of demolition I can officially say that I am not really the "demo type." Yes, it was fun to let out a little pent up energy (which has really been lacking lately) but once the horsehair plaster started to puff out of the wall I turned in my hammer for something a little more fun....

Drum-roll please...


Tissue Paper Pom Poms! wahoo! (can you really get any more girly after knocking down a wall?!)

Auntie K and I worked in the kitchen while the boys made a mess of the living and dining room. I found a little tutorial here and they were quite simple. We made mostly smaller poms and tried one large one. That was an unfortunate flop as we didn't have the required number of tissue sheets to really "fill the ball" out.  So, Auntie K's brilliant idea was to stuff it into a small white vase and voila! Tissue-flower-ready-for-the-table pom. Why did I make these brilliant little poms you are wondering? I am throwing a bridal shower next weekend for one of my closest friends and wanted a pop of pink for decoration. These will look so cute hanging above the buffet or a table!

Since that project didn't take very long we decided to tackle the crib assembly. On our IKEA adventure we settled on this simple white crib from IKEA. The price was right at just $100. I love how simple it is. I told you guys not to look when I took the post painting pic...so now you can:

 
Can't get any more simple than that! We love it though. It fits perfectly between the giant windows. I am glad we didn't buy a crib with those big sides because it would have looked quite funny kiddy-cornered in this room. It feels like the corner of the room really needs a little something-something. So I perused Etsy for some mobile ideas that I could hang up high to fill the empty space. I really liked something like this:


This mobile in particular is made with paper stars. Although very pretty, the store only offers stars and butterflies. Nothing for "cottage living" so I decided I am going to make my own! What better coastal decoration than using shells in a mobile?! Sand dollars already have a hole in them! (Pete would have quit if I had asked him to drill 150 tiny holes into shells). Yes, you heard right. I am estimating about 150 miniature sand dollars. The mobile is rather large but I think it will look perfect in that space. More on that later.  I deemed this project a wait-until-I-have-to-sit-on-my-rear-with-my-feet-elevated type project.

Thursday, April 21, 2011

Eco/Prego Friendly Nursery Painting

So our first homeowners project is complete. We painted the nursery. Wahoo. Going along with our Cottage theme it was only fitting that the walls be painted teal. Not just "any" teal though. "River's Edge" is the name....ahhh....so relaxing. I can already hear Little B calming down from a crying fit when she looks at the walls her Mommy and Daddy painted for her. (Ok I'm dreaming.) If you need a refresher on what the room looked like before you can check out our house tour otherwise keep reading as I get giddy telling you about paint.

But first thing's first. Painter's Tape...we found an extra roll hanging around and we used every last inch. We probably would have had a few inches left over except someone (Peter Peter Peter) gets a little "tape happy" around the corners of the windows.

 Ahem...Look at mine?
So we got the whole room painted and we were armed and dangerous...(I know I don't look too dangerous yet but I can be:)
So. How did we choose our paint? I thought you would never ask! I did tons of research on paint before we moved and decided I wanted to go the "No Odor and No VOC" route. That way, I could help paint and the paint doesn't off-gas "Volatile Organic Compounds" for up to a year! A chemical with the word volatile in it CAN'T be good! So, I went to home depot (by myself I might add) and went to the teeny tiny section that said "No VOC'S". I was very dissapointed in my options. So I took a few swatches home from the other brands and continued my research. Guess what I found?! Mythic Paints. For $50/gallon and FREE SHIPPING (because I live over 12 miles from the nearest dealer) Mythic will color match any competitor's color! Hence "River's Edge" by Behr. Within a week a cute gallon of paint arrived and we were ready to start. I didn't get the primer from Mythic since we were able to find Olympic No-VOC primer at Lowe's for $12/gallon. So final cost for this project? $62 bones.

We did the priming in the AM and the painting in the later afternoon. NO-VOC paints take a little longer to dry. That was OK with us since we needed to do a home depot run for Peter to buy a saws-all. Enter giddy and happy hubby here:


Ok, back to the painting post. Pete will be telling you all about his tools, I am sure.
So that leaves us to the final product. It seems a little bright right now but I am confident it is going to look great when I am done with it:)


(pretend you don't see the crib- Pete wasn't home to move it for me on our first sunny day in a week!) Doesn't the paint look great with the creamy white colored trim? The paint went on AMAZINGLY and I would highly recommend it!

Wednesday, April 20, 2011

Pre-Nursery Painting and 25 Week Preggers Pic

Here is a sneak peak of the pre-nursery painting job we did this weekend. I thought it was only fitting that I give everyone an update since today marks the 25th week of being pregnant! Wow- time flies!

More to come on the painting job. I'm waiting for a sunny day to take some post painting pics. Too bad it's been raining for a week now...

Monday, April 18, 2011

Easy Peasy Throw Pillows

So after the slipcover debacle I was feeling quite defeated. I needed a boost-my-sewing-self-esteem project that I could do in an evening and really see an impact. On our IKEA Adventure I scored some 20 x 20" pillow inserts for $4 a pop and some rectangular sized pillows for $3 each.  Bigger is really sometimes better- especially when it comes to throw pillows. With a solid color couch I wanted big pillows that added visual interest and covered most of the couch. This is what I had to start with:


BORING. Not that the couch isn't beautiful. (This was a craigs list find and my mom re-upholsetered the whole thing.) See? She really is mom-the-sewing-extraordinaire! Throw pillows are expensive and there is no getting around it. These are quite pretty!

I needed to go a little lighter since the couch is so dark. Did I mention that I love burlap? Burlap was invented so it could be a part of Our Cottage On The Coast. Texture? Yes, please. This is what I came up with:


Seriously. Anyone can make these. You could do it by hand and it would take a while (my grandma was a trooper!) or use a machine that goes in a straight line. Sew two squares together with the right sides facing together and leave a 3-4" hole. Flip the pillow cover, stuff it with the form, and sew it up by hand! EASY PEASY. If you want help with your own just come over and I will show you. No need to spend more than $10 for these pillows.


What do you think of our living room so far? Don't get too attached. We just ripped out the wall in between the living room and the dining room! Update on that soon.


The white coffee table is new. BRAND new! I ordered it from Ballard Desings when they were having a huge sale. Yes I only paid $105 for this gem. Oh and look over under the bay window! I just can't wait to have a window seat. That will have to wait as our living room right now looks like it was hit by a hurricane named Peter and Saws-all. More on that soon.

Thursday, April 14, 2011

The Room We've Never Had Before...

A Dining Room!


The great thing about this room (see house tour here)  is it's blank-slateness. Wahoo. A built in hutch, a bay window, and a chandelier. Now what? I love looking at magazines for inspiration, including two that I can see from my perch on the couch: Ballard Designs and Pottery Barn. Although I would love to recreate the beautiful pages from these magazines right here in our cottage- the whole unlimited money thing is kind of lacking these days or any day.

Here is the room I stumbled upon in the most recent Ballard Designs catalog. I am not usually a black furniture type of person, but I love this look. You can totally get the feel of the typically white/neutral tone cottage look while having bolder color accents.


So this brings us to the first of many dilemma's. How can I (and with Peter's help of course) recreate this look for a fraction of the cost? Let's start with the table, since it's the focal point of the room. The nice table above retails for about $1000. Not that bad a price for a well-made dining table that you save for over the years. But I would really like one sooner than "over the years." Pete and I are so excited to have a place to entertain and open our new home up for gatherings. Considering that I would have loved to have a nice little dinner party last week, the whole $1000 dining table wasn't really "in the cards" per say.

---Insert savvy craigslist shopper extraordinaire--- I will give you a Craigslist tour of the furniture I've snagged some other time, because I am quite proud of the steals we've gotten. I can pretty much walk around our place and tell you the deal I scored on just about any of the big furniture. Ok, back to the table. See? I just get so excited about my deals!

I looked and looked for a sturdy solid wood table that has leaves to expand (I want to keep it on the smaller size for day-to-day use) and finally stumbled upon this Ikea gem:


No, no. Don't worry. I don't think it's $300 worthy. It will, however, seat up to 10 people. We couldn't fit 10 people in our last apartment. The greatest thing about this find is the color (black) and the simplicity of the table. I am way more excited nervous  about tackling semi-DIY chairs like the Ballard "dream" dining room. So, back to Craigslist. I found this table from a gal moving out of the country from Harvard Square. Price tag, you ask? I bartered it down to $100 (she was selling ugly chairs with it). So, our semi-long term table search is over.

Now I have to recreate those beautiful chairs! At $140 a pop for the chair, 2 yards of fabric at $24/yd for the slipcover AND a whopping $90 charge to make each slipcover, we'd be looking at $278 per chair (almost $1,700 for 6...gulp!) to achieve this look. HAH! No thank you. You read in Pete's last post that we went on an adventure date to IKEA in search of parsons chairs and ended up with these beauties at $50 each!


They don't look this nice quite yet since we didn't buy the white covers. They charge $10 each for the white slipcovers. Not bad at all- just not the look I am going for. I did buy one slipcover only to tear apart and mark up with a permanent marker for a pattern using my new fabric!! I scored it for $6/yard. A little better than the Ballard Designs fabric but just as beautiful! (I went with the fabric on the right...)


I ventured out to my mom's house and used her sewing expertise to guide me in my slipcover preparations. If anyone can do it, she can. My goal was to learn everything I could in one evening and then I could return home and make the covers for the last 5 chairs.

Not everything in the sewing world goes as you plan, I am sorry to say. I was hoping to show my readers a few success stories before I hit a speed bump in the road of DIY'ing. Oh well, such is life!

Modesty is key. We want our chairs totally
covered...no splitting seams, please.


The front view looks GREAT! I can't wait to see how they turn out. Unfortunately, I have to wait a few weeks to work on them again with mom-the-sewing-extraordinaire. In the meantime I will sit tight and contain my excitement to host dinner parties.


Anyone else want to make me feel better and share their DIY'ing flops?

Monday, April 11, 2011

Does Going to Ikea Count as a Date?

The answer is, of course, yes. Thank you, next question please. A good friend of ours also commented that a trip to Ikea ought to be a requirement for all engaged couples. Thankfully, Jen and I do not find Ikea to be quite such a "seat up or seat down" experience, and are giddy at the prospect of a meal for two for around $10-12. And enough DIY hacks to keep even the best busy for an eternity. But I get ahead of myself...

Saturday afternoon found us trekking down to Ikea to look for dining room chairs, a crib, and general organizing stuff, as well as for the aforementioned meal. Jen had done her research and knew what would fit into our (let's be honest) her design scheme of our cottage, while I had done my corresponding research to find out if we could fit her hopes and dreams into the trunk of our car...one of us did better research than the other. But again, I'm jumping ahead.

We browsed the dozens of showrooms, but with our targets firmly in mind. Without any trouble (save navigating the walkways filled with deer-in-the-headlights customers), we found our crib and chairs, taking the time needed to double check that we'd written down the correct GPS coordinates to find them later. Note: don't mess those up. You'll quickly find yourself in Narnia if you take a wrong turn in the warehouse. We then made our way to the cafeteria, looking to carbo-load before the next leg of our Ikeathlon.

Ahhh, Ikea food. You slay us. Ikea knew we were coming this past weekend, so they ran a special just for penny-pinching thrifty Jen and Pete: if you spend over a certain amount in home furnishings, everything you bought (and consumed...ooops, didn't read that part well) in the cafeteria was FREE! HA! Enter a thrifty man and his pregnant wife. Feel the pain, Ikea, feel the pain:


Yes, there are two chocolate bars in addition to desserts. And apple sauce. I almost grabbed baby food, too, but figured that was over the top. Let me tell you, $20 of food at Ikea is not only hard to amass, it's hard to put away. But we did. We're troopers.

So fast forwarding a little, we rolled ourselves out of the cafeteria and entered the mesmerizing first floor of Ikea. If you haven't been, it's a truly magical place. A place where candles are like penny candy, light fixtures like locusts, and storage solutions that make engineers weep. So we browsed--or grazed, and made it to the warehouse section with 4 or 5 KONTANER systems, a bunch of PIKTURS, and a dozen or so other VONDERFOL things (seriously, who makes Ikea PRODUKT names up?).

Now it came time to use my dead-reckoning skills to find our chairs and crib (thanks Auntie K and Uncle J!), which I must say, I did quite well, and we lumbered our way to the check-out lines, looking like a train driven by a heavily medicated conductor. Out to the parking lot, I fetched the car and began loading. This is where my research began to show it's holes. We had to fit this:


into a Volvo V50. Suffice to say that this Ikea trip was looking a lot like one of our previous trips, wherein I thought we could fit this into this (oh yeah, and we had two bikes on the roof and the trunk full of luggage). But, this was going to be different! We now have a station wagon, which means we are INVINCIBL! (Ikea, feel free to use that as a produkt name, just give me kredit). So off came all the packaging and the jigsaw puzzle began. Success, thankfully, was in my grasp tonight, and we made our way home...after getting cinnamon rolls and soft-serve cones :) Gotta leave with a treat.

So stay tuned for the real genius of this Ikea trip, as Jen is working on making some custom covers for the chairs we got! So stinkin' creative...

Have you got an Ikea story?

Friday, April 8, 2011

Quick-and-Easy-Bathroom-Spruce-Up

 I love little projects. Especially when they cost under $20! Before I unpacked the bathroom boxes I wanted to spruce up the drawers a little. You could tell the drawers were a little el-cheapo by the little round stickers on the bottom of each drawer that says "C". I know, from past experiences, you only see these little things when it is an assemble yourself dealy. I'm not knocking  the assemble yourself by any means (we are IKEA fanatics) I just like to hide that fact once it's assembled. Here are the drawers and medicine cabinet before my little paper project:

I went to Michaels and  was super excited to find scrapbooking paper was on sale. I picked up 3 12x12 sheets for a whopping $0.51! Phew! I broke the bank. Here were my supplies:

  1. My trusty paper cutter
  2. A roll of double-stick tape I had on hand
  3. A measuring tape


 I measured the drawers and they were 14". A little longer than the 12" paper. I just added a 2" strip at the end and incorporated it in using the double stick tape.


TA DA! Pretty drawers! Oh Yeah and I had a little left over. I'm not even going to pretend I planned on doing the medicine cabinet. You likey?

 Here is the medicine cabinet:


 I wrapped the paper around the edges so it would "pop" a little more.


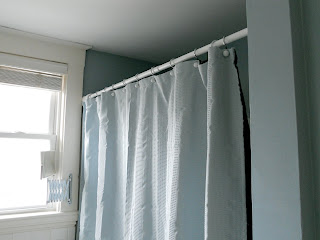
I'm not done though! Look what I found in the clearance section at Target! A nice stainless tension rod for our shower curtain. $10 off the original price just because it has been opened before. I don't mind. In fact, someone else did all the work for me. I just had to undo the tape! 

Here is the kinda ugly white tension rod that was here before:


 And after! A quick fix that spruced up our little bathroom. Now I'm ready to unpack! I want to make a new shower curtain since our old one is a little too matchy-matchy with the walls:


 And there you have it. A quick project for under $20 total and you can see the results in under an hour! My kind of project. It basically took me as long as an hour-long t.v. show on the DVR. Yes, that's right 40min. I wonder if I would have gotten this project done if Grey's hadn't been a repeat...
Wednesday, April 6, 2011

Our First Cottage On The Coast...

       So here is a little peek at our very own Cottage Condo on the rocky shores of Massachusetts. We just LOVE it here. I mean, how could anyone live further than 5 minutes from the ocean...really? Before I introduce our first little nest I should let you in on a little secret that you may not know about us. We REALLY love the beach. Probably even more than our closest friends realize. Last summer we ate dinner 3 or 4 times a week at the beach. We swim, walk, relax, and just love life with sand between our toes and the salt air in our nose. So...narrowing down places to search for our first cottage with beach access left us with only a few possibilities to lay our hats.
       We settled on a condo within walking distance to local parks and, of course, the beach. We wanted a place that we could have fun updating and making the space our own without having to gut an entire house. We can't wait to share with everyone some of our plans and of course our thrifty purchases along the way! I just love a deal. Ok here she is:
       

This is the living room when you walk in the front door. Possibly the biggest design challenge of the whole place. This room is tiny. But, hey, I'm up for a good challenge. Look how bright it is - that bay window is just screaming to me, "Make me a window seat!" Well, it's screaming at Pete to make him (yes, I just referred to the bay window as a male) into a window seat.
The living room opens up into the dining room (excuse the bags of trash by the door!). Look! Another bay window. Isn't he cute? Ohh and the built in- boy do i have plans for her!

And the kitchen! The kitchen was recently redone so we don't need to do a ton of work on it right away, but I would like to make some changes down the road- not really my style right now. One of my first projects is replacing the ugly (and i mean ugly) flowers-that-look-like-birds drawer and door pulls. Uggh. Why would you choose those?

Look how much space is in this kitchen! And look, look, look! A window over the sink! Yup- never had one of those before:) Maybe i will help Pete a little more with dishes now that i have something to look at...

A few shots of the basement...Definitely a great place for storage and laundry right now...more on that later.

Some leftover supplies from the previous owners- extra paint is always helpful...

This is the second floor bedroom at the back of the house. This will become Little girl B's nursery. Look at all the light:)

AND it has a closet. Another foreign thing to us "B's".

This is the hallway that leads from the nursery to our bedroom. Not too far for those late night stumbles to the nursery in a few months.

Oh Look! We passed a linen closet on our journey down the hall. Do I even own enough to fill these closets?

Here is the bathroom. Another wow factor for us. A bathroom that has enough room for both of us to be in it at one time and our elbows won't knock each other. A Miracle.

Oh yes- the bathroom is big enough to merit TWO pics.

Here is what I guess you could call the Master Bedroom. There really isn't anything master about it since it's the same size as the nursery and equal distance to the bathroom.

We did like this room a little more because of the flat wall for our wonderful bed.  Don't worry- you will get to see her all dolled up soon.

But there's more! (You thought it was over?) This is the third floor room, which we will call the studio/guest quarters up in the tower. This is just the perfect little retreat to work on sewing projects and my business: Cottage On The Coast. See that door in the top right corner? That goes into the unfinished attic...

It's tiny- but it's an extra little space that will be very valuable in a few months:)

Here is one shot of the attic. It's much bigger than it looks here. I can keep all my fabric stashed away in here and no one will ever see it! That makes me happy.

Our condo on the coast even has a cute little porch. AND a red door. AND a spot for rocking chairs...

Yes- it's sold. Sorry you can't have it. Want your own? Have Laura or Jory from Team Crowell hook you up with your own pad. Follow them on facebook here: TEAM CROWELL


 So there she is. Our new pad! Do you like it? We sure do. Can't wait for you guys to see what I have dreamed up in my head. Pete only sees $$ flash across his eyes - but he's used to it. After all, my dad did warn him that I was expensive...but now a newly minted deal shopper, to boot!
Related Posts Plugin for WordPress, Blogger...